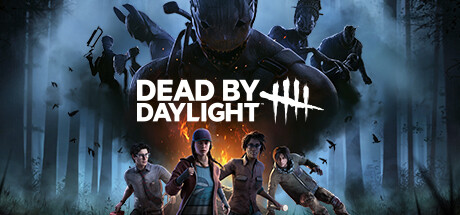
Dead by Daylight Killer Guide: Tracking, Chases, Hooks & Generator Pressure
Dead by Daylight Killer guide covering tracking Survivors, Scratch Marks, generators, chases, pallets, windows, downs, hooks, Killer Powers and managing pressure across the map.
Dead by Daylight Killer Guide: Tracking, Chases, Hooks & Generator Pressure
Dead by Daylight Killer Guide: Tracking, Chases, Hooks & Generator Pressure
Behaviour defines the Killer's objective simply: hunt Survivors, down them and sacrifice them to The Entity. The challenge is doing that quickly enough that the four Survivors cannot finish their generators and escape.
Understand the Time Pressure
Survivors can work on generators while you chase one person.
Every long chase therefore has a strategic cost.
Patrol Generators
Behaviour's official guide explicitly recommends patrolling and damaging generators while searching for Survivors.
Pay attention to:
- Generators with visible progress.
- Areas where Survivors were recently seen.
- Noise notifications.
Do Not Patrol Randomly
Create a route through the generators most likely to be worked.
If one side of the map has little remaining strategic value, spend more time where objectives are still active.
Noise Notifications
Behaviour confirms that failed Skill Checks and rushed actions can create noise notifications.
Use these as information, not as a command to abandon every other priority immediately.
Scratch Marks
Running Survivors leave Scratch Marks.
Follow the trail while also watching for:
- Sudden direction changes.
- Nearby windows.
- Pallets.
- Lockers.
When the Trail Stops
Behaviour recommends checking nearby lockers when a Survivor trail suddenly disappears.
Also consider whether the Survivor began walking or changed elevation.
Start Chases With a Plan
Before committing, notice where the Survivor is running.
If they are heading toward a very strong structure while another generator is nearly finished, abandoning the chase may be the better decision.
Pallets
Survivors can drop pallets to block your path or create stuns.
Do not attack through every pallet interaction automatically.
Decide whether to:
- Respect the pallet.
- Force the drop.
- Break it.
- Use your Killer Power to play around it.
Windows
Windows let Survivors extend a chase.
Learn common structures so you understand where a Survivor is likely to go after each vault.
Do Not Chase Forever
If a Survivor repeatedly reaches strong resources and you are making little progress, leave.
Returning to generator pressure can force that Survivor into a less comfortable situation later.
Use Your Killer Power
Every Killer is unique.
Behaviour specifically advises learning the individual Killer's Power because it changes how you:
- Track.
- Chase.
- Control areas.
- Close distance.
Learn One Killer Deeply
New Killer players improve faster when they spend enough time understanding one Power instead of changing Killers every match.
Hits and Health States
Behaviour's official guide explains the core sequence:
- A healthy Survivor becomes injured after a normal damaging hit.
- A further damaging hit can place them into the Dying State.
Hook the Downed Survivor
Once a Survivor is downed, pick them up and carry them to a hook.
Do not spend excessive time searching for a perfect hook while other Survivors continue objectives.
Hook Pressure
A hooked Survivor forces the team to make a decision.
Other Survivors may need to:
- Leave generators.
- Travel across the map.
- Heal after the rescue.
Do Not Abandon the Entire Map
Remaining directly beside one hook for a long period may allow several generators elsewhere to progress uncontested.
Use the match situation to decide how much attention the hook deserves.
Three-Hook Sacrifice Structure
Behaviour's current game guide states that a Survivor can be sacrificed after progressing through repeated hook states, including being hooked a total of three times under normal progression.
Tracking who has already been hooked can help you understand team pressure.
Prioritize Productive Chases
A good chase:
- Produces a hit quickly.
- Forces useful pallets.
- Pushes the Survivor into a weak area.
- Ends in a down before too much generator progress occurs.
Do Not Tunnel Into Bad Terrain Automatically
If a Survivor is taking you away from every remaining generator, consider whether they are intentionally pulling you out of position.
Information Perks and Add-Ons
Perks and Add-Ons can help reinforce a Killer's strengths or cover weaknesses.
Build around the Power and your current strategic problem rather than choosing effects only because they are popular.
Killer Routine
- Identify likely generator activity.
- Use tracking information to locate Survivors.
- Commit to favorable chases.
- Use your Killer Power efficiently.
- Down and hook Survivors.
- Return pressure to generators.
- Abandon inefficient chases before they consume the entire match.
Common Killer Mistakes
- Chasing one Survivor for several generators.
- Ignoring Scratch Marks and noise alerts.
- Failing to patrol generators.
- Using the Killer Power randomly rather than strategically.
- Breaking every pallet immediately with no thought.
- Remaining far from active objectives for too long.
Bottom Line
Dead by Daylight Killer play is a race against four Survivors' combined time. Track efficiently, choose chases that produce pressure, use your Killer Power deliberately and turn downs into hooks without abandoning generator control. A Killer wins by managing the entire Trial, not simply by chasing one Survivor well.